
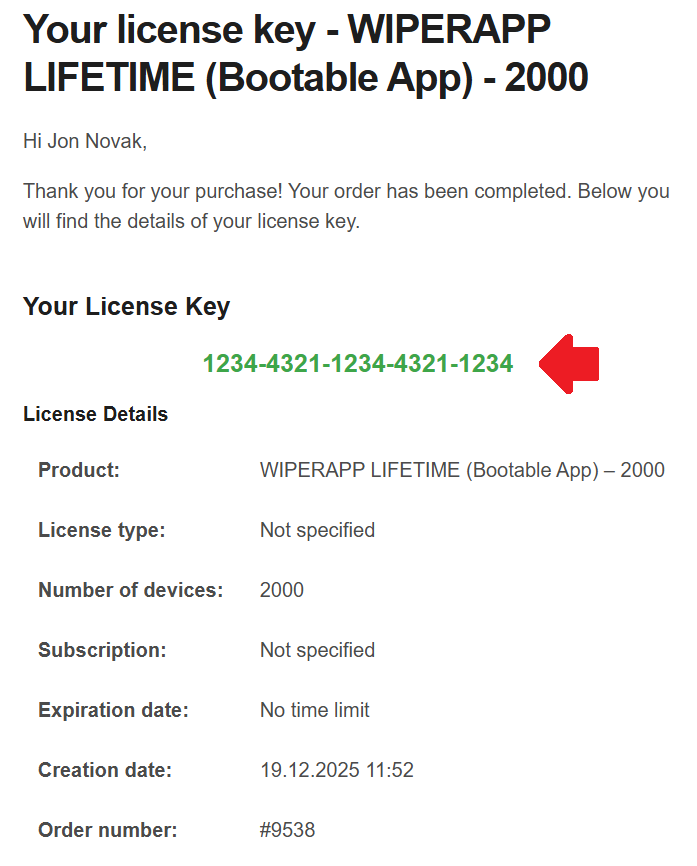
1. Purchase license and get redeem code
Visit wiperapp.com to select and purchase the license that fits your needs. Once the transaction is complete, you will receive a confirmation email containing your unique Redeem Code. Keep this code safe, as it is required to activate your software and start the wiping process.
2. Create Your ADMIN Account – registration on panel.wiperapp.com
Go to http://panel.wiperapp.comregister and register your admin account to fully manage WIPERAPP certificates, users, and licenses.

Full article: https://wiperapp.com/docs/wiki/getting-started/registration/
3. Download WIPERAPP ISO
Go to the Downloads tab and download the latest version of WIPERAPP ISO.
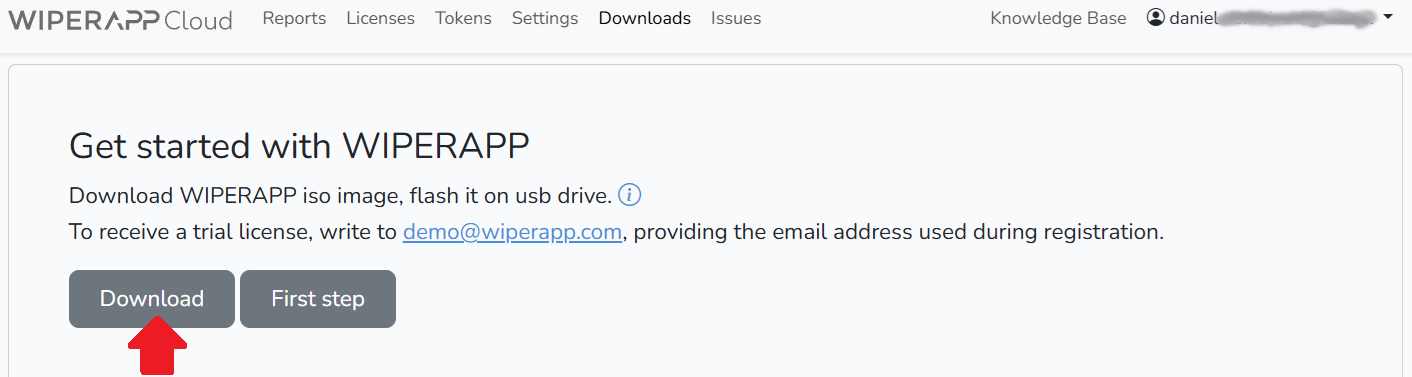
Full article: https://wiperapp.com/docs/wiki/getting-started/download-wiperapp-iso/
4. Create your WIPERAPP pendrive
Burn the WIPERAPP ISO file to a USB drive using balenaEtcher. You can download the software from: https://etcher.balena.io/
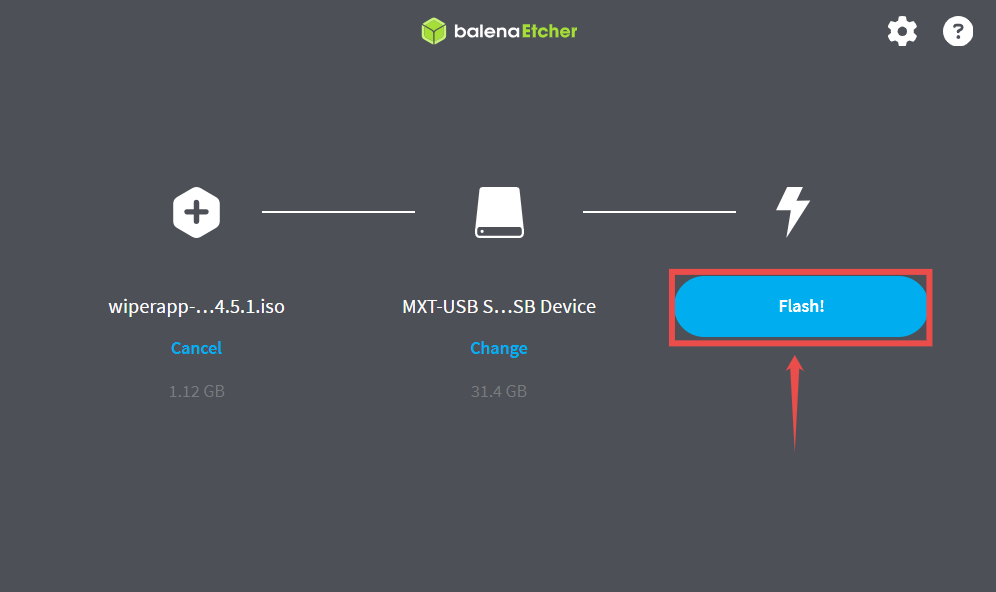
Full article: https://wiperapp.com/docs/wiki/getting-started/prepare-a-flash-drive/
5. Token – Your encrypted private key – creation and adding to Your WIPERAPP pendrive
Go to the Token tab in your admin panel to create a unique, encrypted token to identify your account and licenses. You will receive an email with your credentials – please use only one of the following methods: Scan the QR code via webcam upon launching WIPERAPP OR manually upload the key.wiperapp file to your WIPERAPP USB drive.

Full article:
• Creating token: https://wiperapp.com/docs/wiki/tokens/creating-a-token/
• Adding Token to USB Drive: https://wiperapp.com/docs/wiki/tokens/adding-token-to-pendrive/
6. Upload your License – use Redeem Code
Activate your purchased licenses using a redeem code. Go to the “Redeem Code” tab, enter the code received via email, and submit to load your licenses.

7. WIPERAPP Settings
After logging in to your admin account, go to the Settings tab to configure your preferences. While these settings can also be modified within the application itself, changes made there will not be permanently saved for future sessions on other computers. Additionally, please ensure your Profile details are complete; you can access this section by clicking the dropdown arrow next to your email address in the top-right corner.
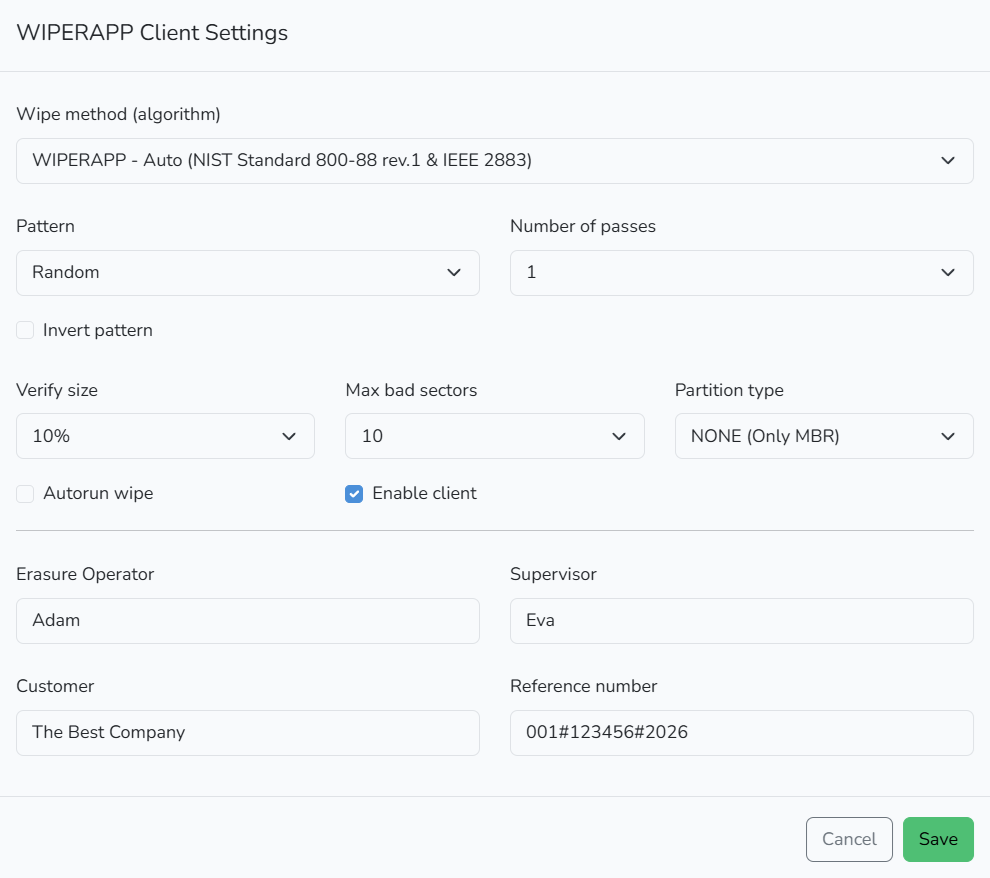
Full article: https://wiperapp.com/docs/wiki/settings/settings/
8. Booting WIPERAPP
Insert the USB drive with the WIPERAPP ISO and open your computer’s Boot Menu. Select the WIPERAPP USB drive from the list and press Enter. Please note that booting from external media is often disabled by default; you may need to disable the “Secure Boot” option in your BIOS/UEFI settings to proceed.

Full article: https://wiperapp.com/docs/wiki/getting-started/start-wiperapp-iso/
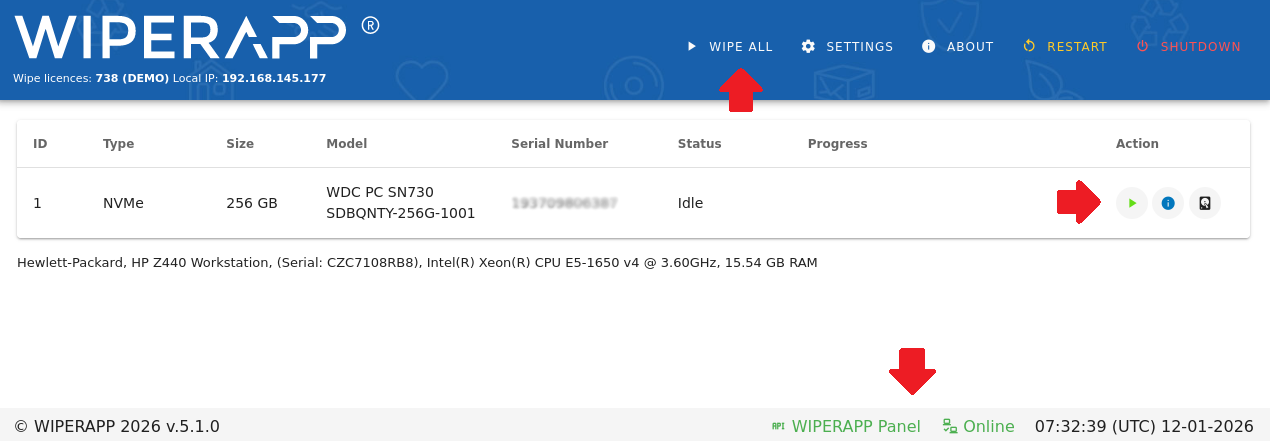
9. Wiping & download certification
Once WIPERAPP is launched, you can proceed with the data erasure process. The green “WIPERAPP Panel” and “Online” icons at the bottom of the screen indicate a successful connection to the Internet and the server. To start the process, click the green arrow next to a specific drive or select “Wipe All” at the top of the screen to clear all drives at once.
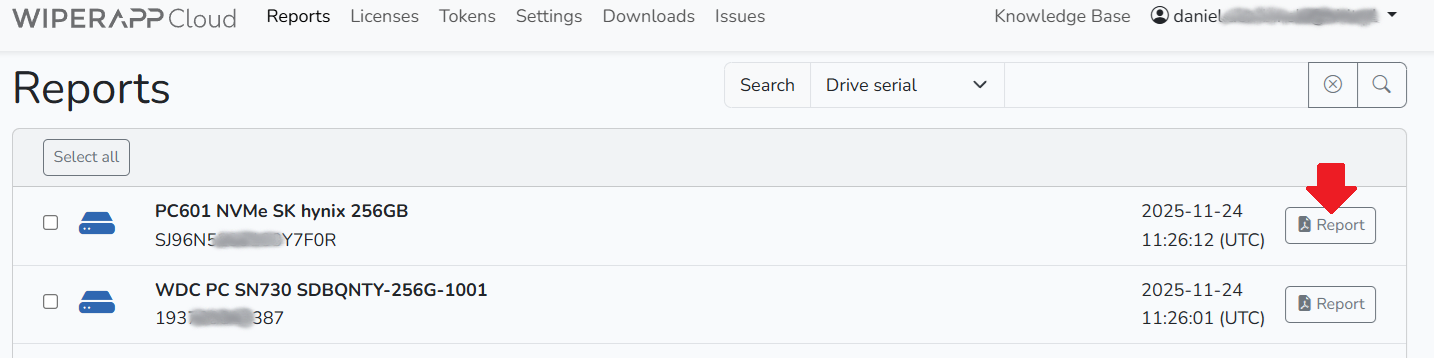
To download a certificate, go to panel.wiperapp.com/reports and select the specific certificate you wish to download.
Full article:
• Wiping: https://wiperapp.com/docs/wiki/wiping/
• Download report: https://wiperapp.com/docs/wiki/reports/