
1. What you need
Step 1: A USB flash drive with the latest WIPERAPP ISO written to it.
Step 2: A phone or tablet with a camera that can scan QR codes.
Step 3: Internet access on the phone/tablet (for wiping authorization).
Important – before you start
To ensure that the OFFLINE wiping process and later certificate import work correctly:
- The WIPERAPP USB drive must stay connected to the computer for the entire wiping process.
- You can unplug it only after the message confirming that the wiping process has finished appears on the screen.
2. Starting WIPERAPP in Offline Mode
Step 1: Boot the computer from the USB drive with WIPERAPP.
How to boot, clik Start WIPERAPP ISO
Step 2: From the list of available boot options (there are four), select the OFFLINE version.
Step 3: After WIPERAPP loads, the GUI window will appear and, after a second, the Settings tab will open automatically.
3. Configuring settings
Step 1: In the Settings tab, fill in all required information (e.g. customer details, referense number, responsible person – according to your process).
The “Wipe Organization” field will be filled in automatically when importing certificates after the wiping process from the panel.
Don’t forget to fill in this field on your administration panel!
Step 2: Confirm the configuration by clicking “Save”.
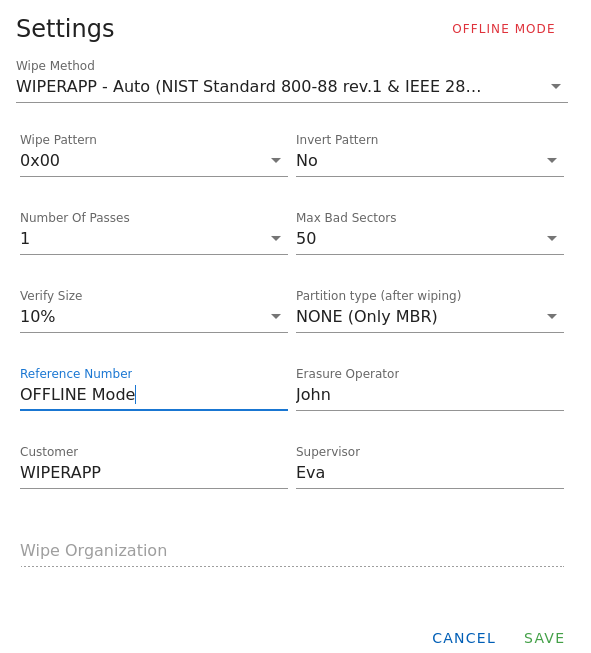
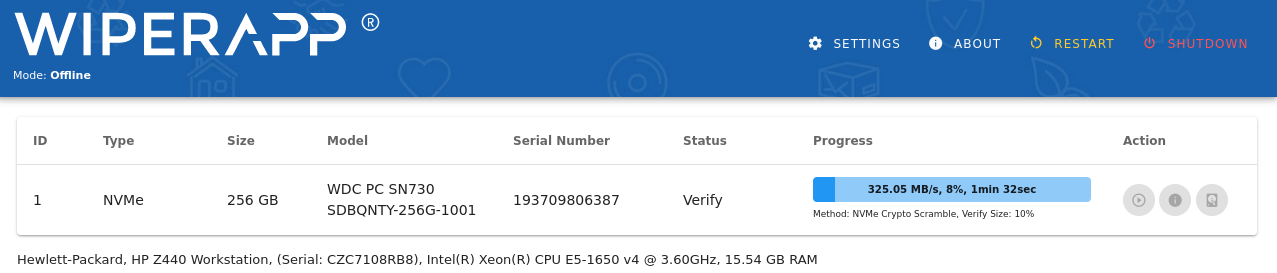
Step 3: After saving, you will see the full active GUI view:
• SMART parameters of the drive,
• drive contents in the HexViewer,
• access to the Settings and About tabs.
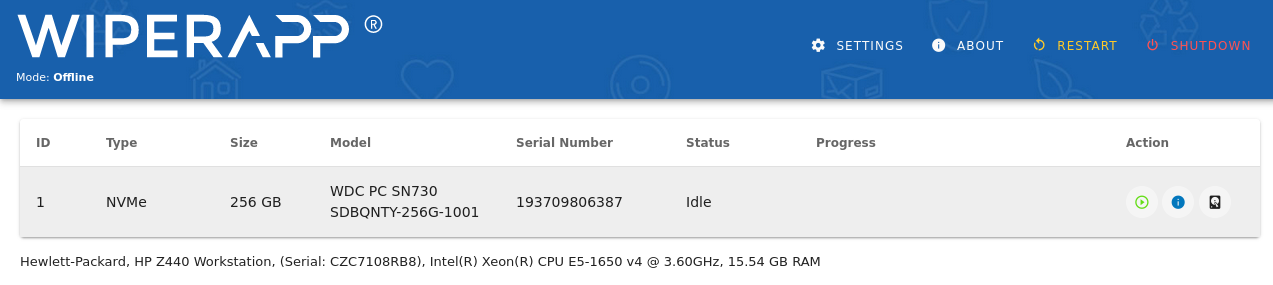
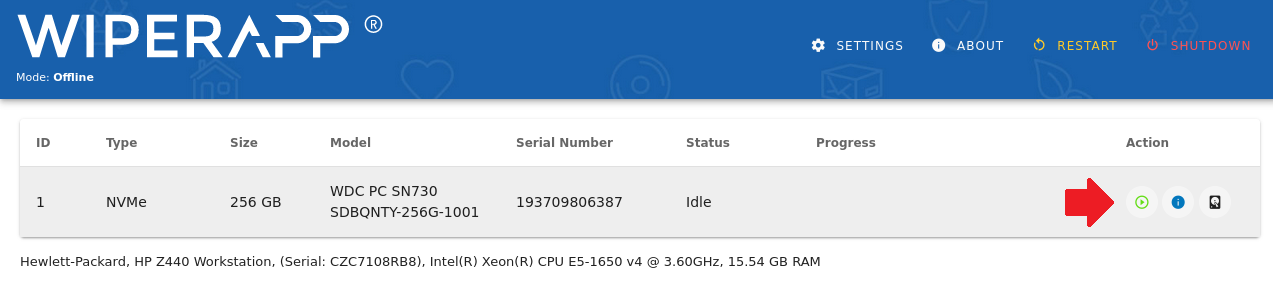
4. Starting the Offline wiping proces
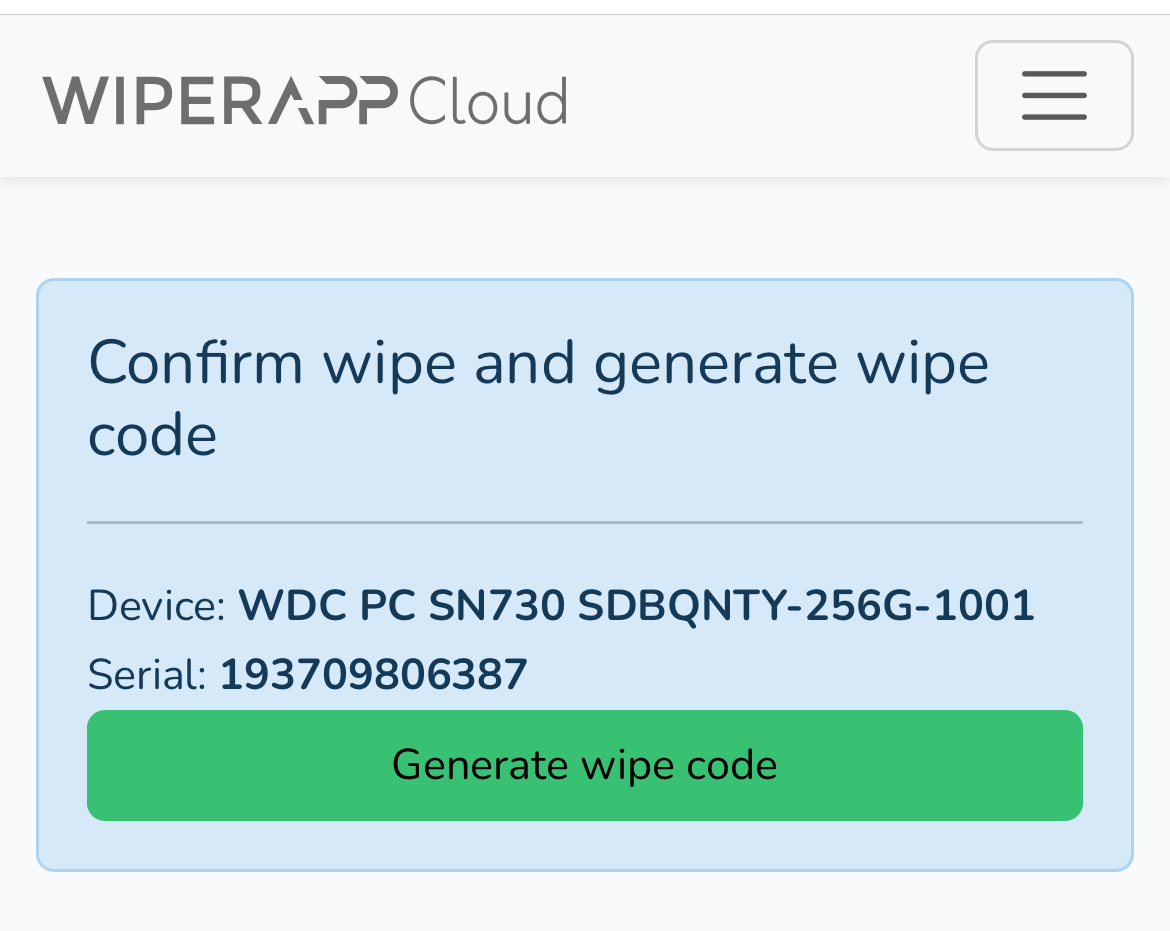
Step 1: In the device list, select the drive you want to wipe.
Step 2: Click the green arrow next to the navigation buttons for the selected drive to start the wiping process.
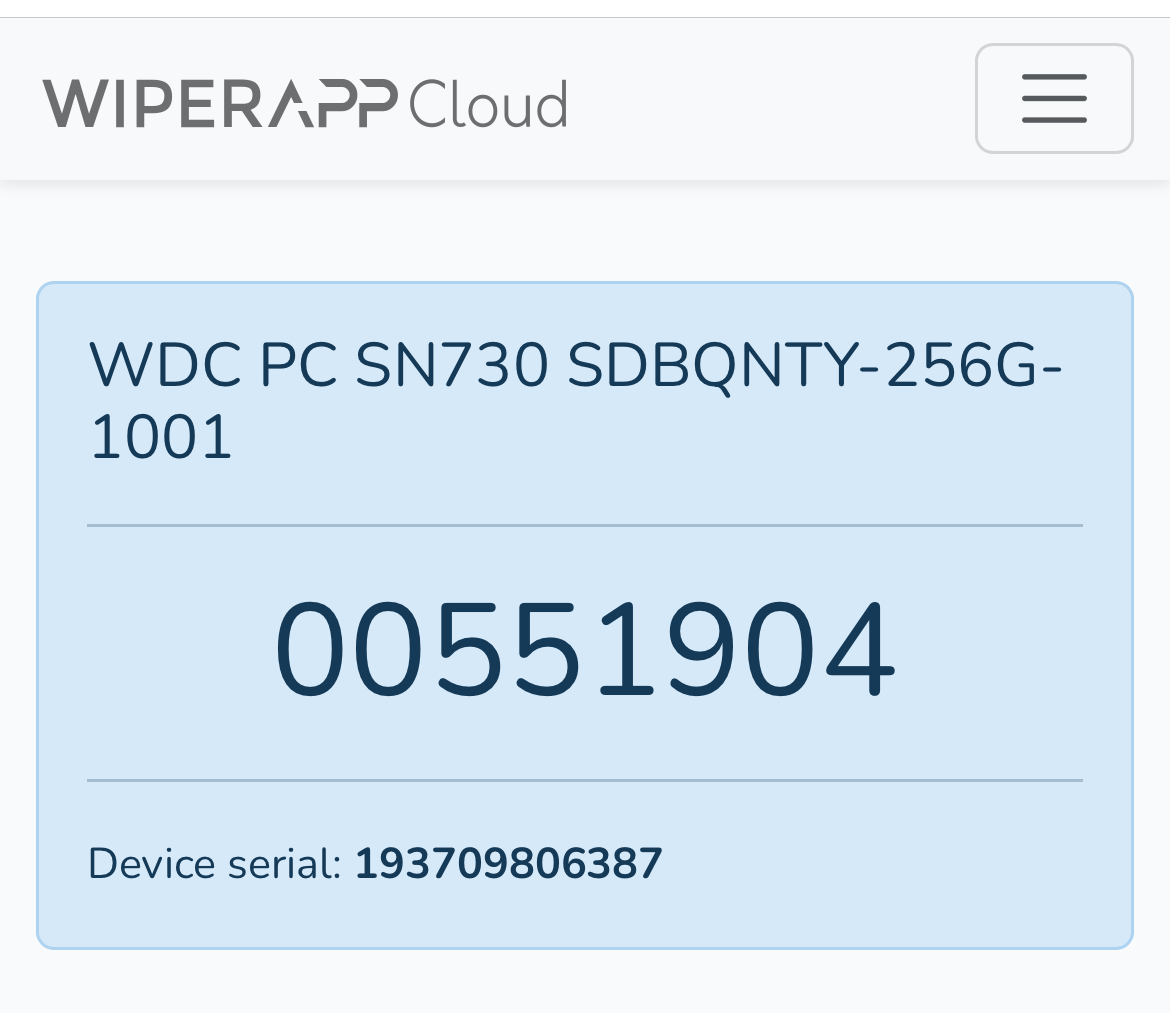
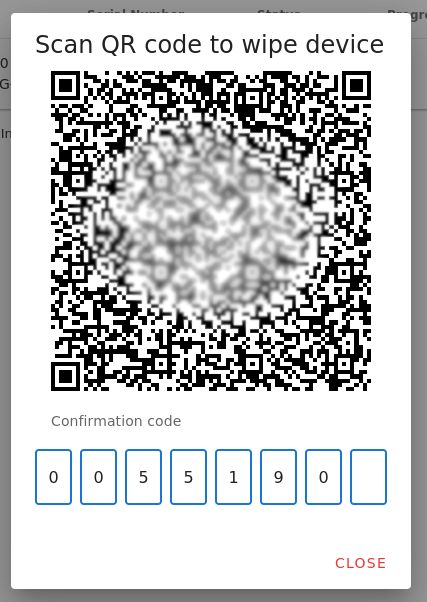
Step 3: A window with a QR code to scan will appear.
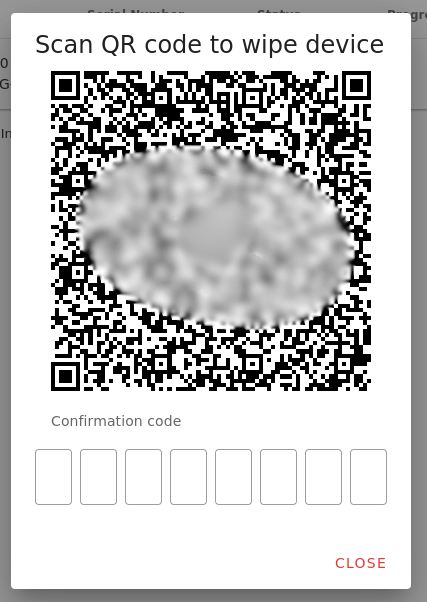
5. Authorizing wiping via QR code
Step 1: Use your phone or tablet to scan the QR code shown on the screen.
Step 2: Open the link provided by the QR code.
Step 3: Log in to your account and:
• verify the drive’s serial number,
• confirm that you want to wipe the selected drive.
After confirmation, a verification code will be generated on your phone/tablet.
Step 4: Enter this code into the WIPERAPP application on the computer.
Step 5: Once the code is correctly entered, the wiping procedure will start.
6. Finishing the wiping proces
Step 1: Wait until the wiping process is completed.
Step 2: When it finishes, a message confirming the end of the wiping process will appear.
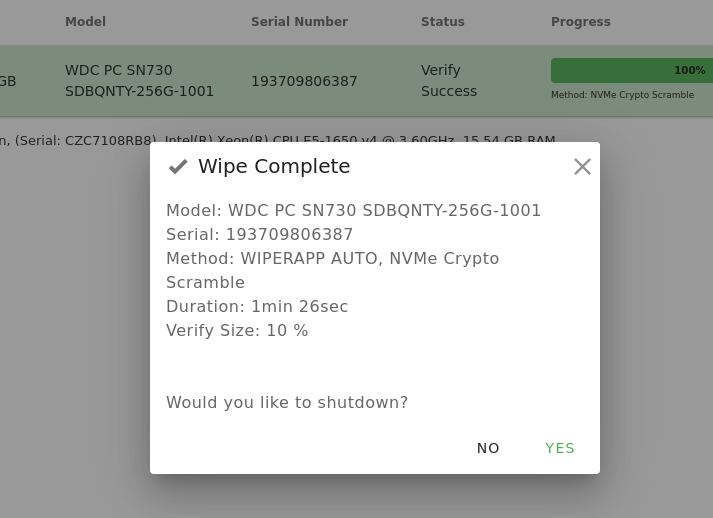
Only then you can:
• disconnect the WIPERAPP USB drive,
• move on to wiping the next computers,
• proceed to import the encrypted certificate files into your admin panel.
7. Importing Offline wiping certificates
Step 1: On a computer with Internet access, go to panel.wiperapp.com.
Step 2: Log in using the same account that you used on your phone/tablet for the uthorization.
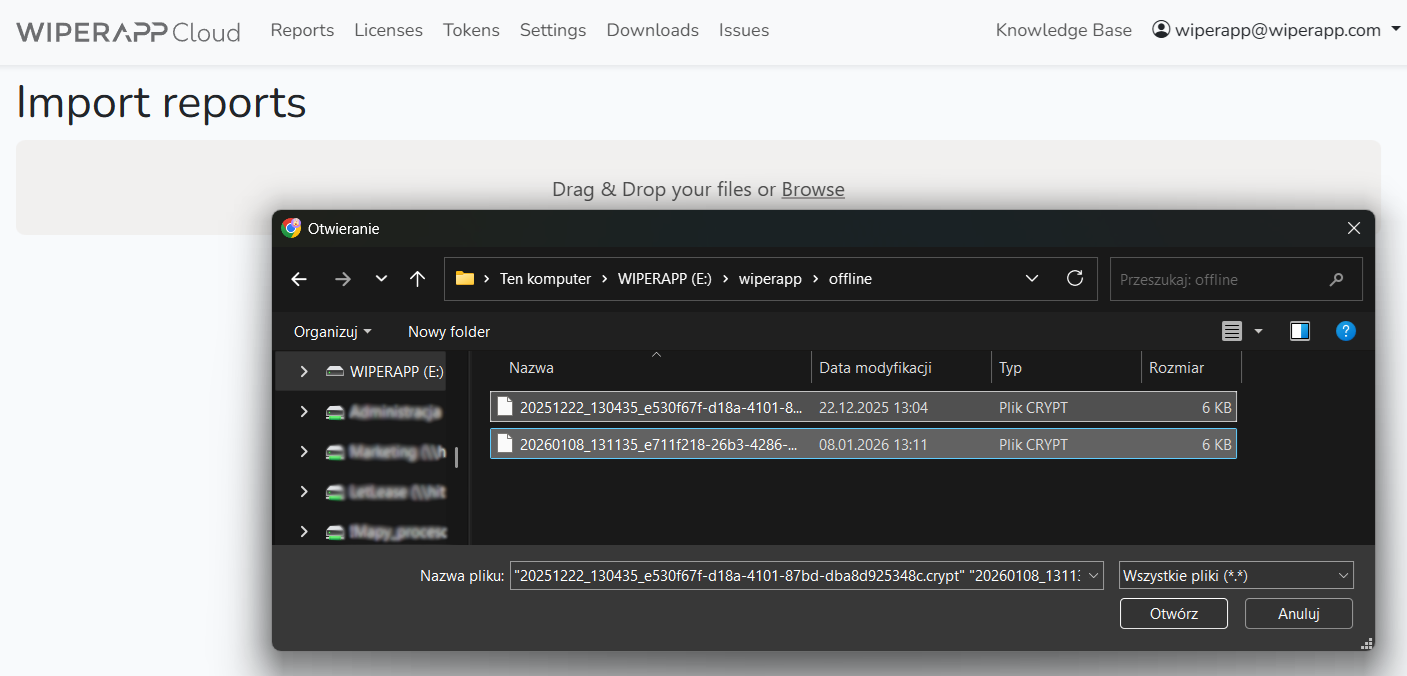
Step 3: Go to the Reports tab and click “Import reports”.

Step 4: Connect the WIPERAPP USB drive to the computer.
The encrypted files ready for import are stored on the USB drive in: (WIPERAPP)\wiperapp\offline.
Step 5: Import the report files using one of the following methods:
• drag and drop the files into the designated area,
• click “Browse”, navigate to the folder with the files, select all files to import and click “Open”.
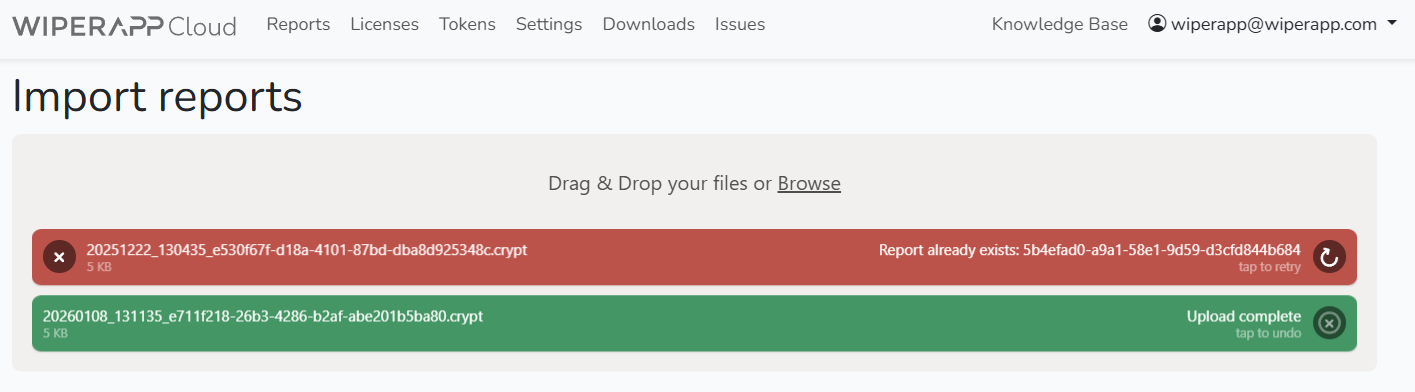
Step 6: During the import, you may see two types of file status:
- Green highlight – the file has been imported successfully.
- Red highlight – an import error occurred, for example:
- the file is not a valid report file,
- the certificate has already been imported before (duplicate).
8. Accessing certificates
After the import is completed wiping certificates are immediately available in the panel, you can download them and
attach them to orders or share with your customer according to your internal procedures.
